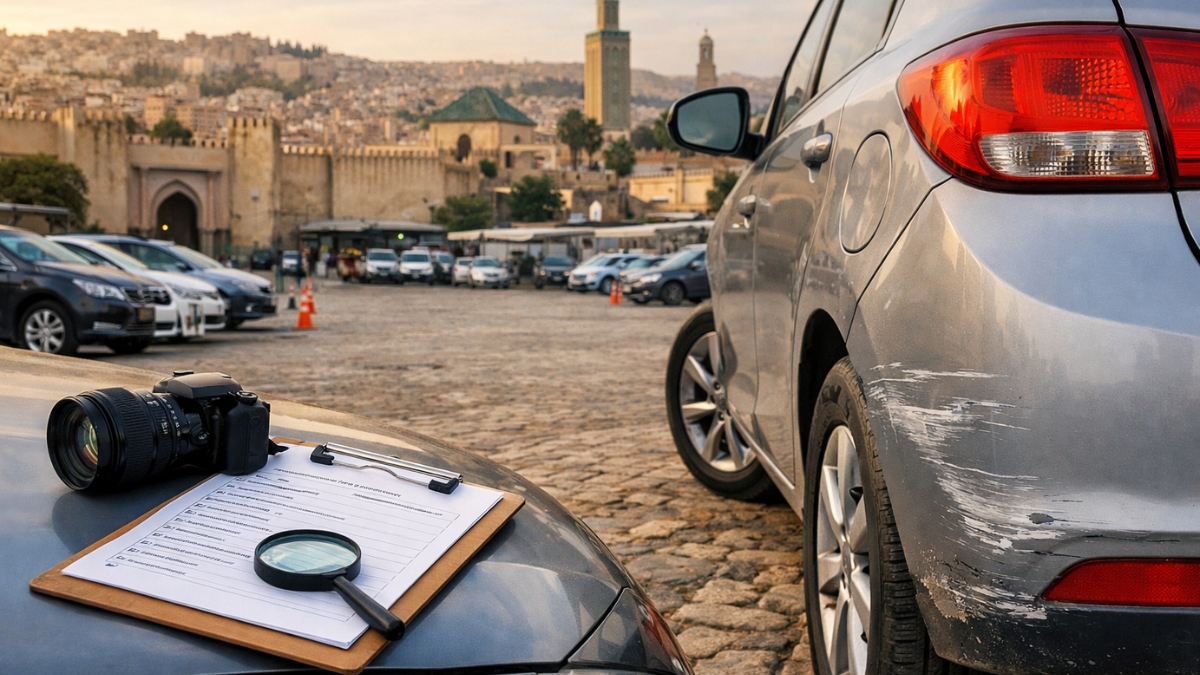
Arriving in Fes, picking up your rental, and driving off in a hurry is the fastest way to end up in a “that scratch was already there” argument later. The good news is you can prevent almost every common dispute with a simple routine: a consistent photo checklist + a few close-up proofs that clearly show existing wear, the car’s fuel level, and the dashboard status.
This guide gives you a practical, repeatable inspection method you can do in 8–12 minutes, even if you’re picking up at night or in a busy street.
Table of contents
Before you touch the car: 60-second setup
The 360° walkaround photo checklist
Close-ups that matter (the “dispute stoppers”)
Inside cabin photos: what people forget
Tires, wheels, and under-bumper checks
Fuel, mileage, and dashboard proof
Delivery/pickup in tight streets: Fes realities
Return-day “mirror” checklist
FAQ
1) Before you touch the car: 60-second setup
Do these first so your photos are usable if you ever need to show them:
Clean your camera lens (it’s the difference between “clear scratch proof” and “blurry argument”).
Turn on your phone’s timestamp setting if you use it, or at least keep your photos in one dedicated album called “Fes Rental Pickup.”
Take one wide shot showing the car and its surroundings (curb, lighting, location context).
If it’s dark, use flash only for close-ups, not wide shots (flash can hide shallow dents).
Tip: If you need to quickly mark damage on photos (circle a scratch, add an arrow), use your phone’s built-in tools like iPhone editing/markup so the evidence is obvious and easy to understand later: Edit photos and videos on iPhone
2) The 360° walkaround photo checklist
This is your core set. Don’t zoom. Stand back enough to show full panels and alignment.
Take these 12 photos, in order, moving clockwise:
Front (center)
Front-left corner (3/4 angle)
Left side (full side)
Rear-left corner (3/4 angle)
Rear (center)
Rear-right corner (3/4 angle)
Right side (full side)
Front-right corner (3/4 angle)
Hood close enough to see reflections (shows dents)
Roof (best effort—step back, tilt up)
Windshield (full frame)
Rear window (full frame)
Why it works: a complete “loop” makes it hard for anyone to claim damage appeared on a panel you never documented.
3) Close-ups that matter (the “dispute stoppers”)
After your 12 wide shots, switch to close-ups. These are the photos that prevent 80% of disputes:
Bumper corners (front-left, front-right, rear-left, rear-right): scrape magnets.
Door edges + handles: chips and fingernail scratches show up here.
Mirrors: cracks and scuffs are common and easy to miss.
Headlights and tail lights: take close-ups that show lenses clearly.
Any visible scratch: take two photos, one close, one mid-range showing where it is on the car.
Pro move: For each scratch, place an object for scale (your key fob, a coin) next to it, without covering the scratch.
4) Inside cabin photos: what people forget
Interior disputes happen too, especially stains, burns, or tears.
Take these 8 interior photos:
Driver seat (full)
Passenger seat (full)
Rear seats (full)
Dashboard (wide)
Steering wheel + stalks (close)
Center console (close)
Floor mats (driver + passenger)
Trunk/boot (wide + floor close-up)
If the car has child-seat anchor points, folding seats, or a third row, take one extra shot showing their condition.
5) Tires, wheels, and under-bumper checks
Wheels are a classic dispute zone because curb rash is common and expensive to “repair” on paper.
Take 8 wheel photos:
Each wheel: one close-up of the rim + one shot that shows tire tread and sidewall.
Then do two quick under-bumper shots:
Front lower lip (crouch, shoot under)
Rear lower lip (same)
If you want a simple reference for what “healthy tire condition” looks like and why pressure matters (especially before a longer drive), this guide is clear and visual: Bridgestone tyre pressure guide: https://www.bridgestone.com.au/learn/maintenance/tyre-pressure
6) Fuel, mileage, and dashboard proof
These photos are non-negotiable:
Odometer/mileage (clear shot)
Fuel gauge (same photo if possible)
Dashboard warning lights (engine, tire pressure, ABS, etc.)
Time/date shown on the infotainment or cluster (if visible)
If there’s any warning light on, take:
a dashboard photo showing it, and
a short video showing the engine start and the warning remaining on.
7) Delivery/pickup in tight streets: Fes realities
Fes pickups can happen in places where space is tight and lighting is uneven, especially near older neighborhoods, narrow streets, or busy curbside spots.
To protect yourself in these situations:
Ask to move the car 20–50 meters to a brighter or wider spot if possible.
If you can’t, do your wide shots anyway, then rely on close-ups with flash for the key areas (bumpers, wheels, windshield).
Record a 15–20 second walkaround video if you’re rushed. Videos help show panel alignment and reflections that reveal dents.
8) Return-day “mirror” checklist
Do a faster version when you return the car, this is how you avoid last-minute surprises:
Re-take the same 8 angles (front, 4 corners, both sides, rear).
Photo of fuel gauge at return (especially if full-to-full).
Photo of odometer again.
Quick rim close-ups if you parked near curbs during the trip.
If it’s a night return, use flash for wheels and bumper corners.
If staff isn’t present, take your photos with the car parked in the return spot, and include one wide shot that clearly shows the location/return area.
FAQ
How many photos should I take at pickup?
Aim for 25–40 photos plus a short walkaround video. It sounds like a lot, but it takes under 12 minutes when you follow the order.
What damage is most commonly disputed?
Bumper corner scrapes, wheel/rim curb rash, door edge chips, and small windshield marks.
Should I take photos even if the car looks perfect?
Yes. “Perfect” is exactly when you want proof, because later you won’t be able to show what it looked like at pickup.
What if it’s dark or the car is dirty?
Do wide shots anyway, then use flash for close-ups. If it’s dusty, focus on areas where damage shows clearly: wheels, bumpers, lights, and glass.
Do I need a video too?
If you’re rushed, yes video is the fastest way to document everything. Still take dashboard/fuel/odometer photos.
What should I do if I find damage not written on the report?
Photograph it clearly, then ask for it to be noted before you leave. If you’re sent away quickly, message the proof immediately and keep it in your records.
 Same prices and offers